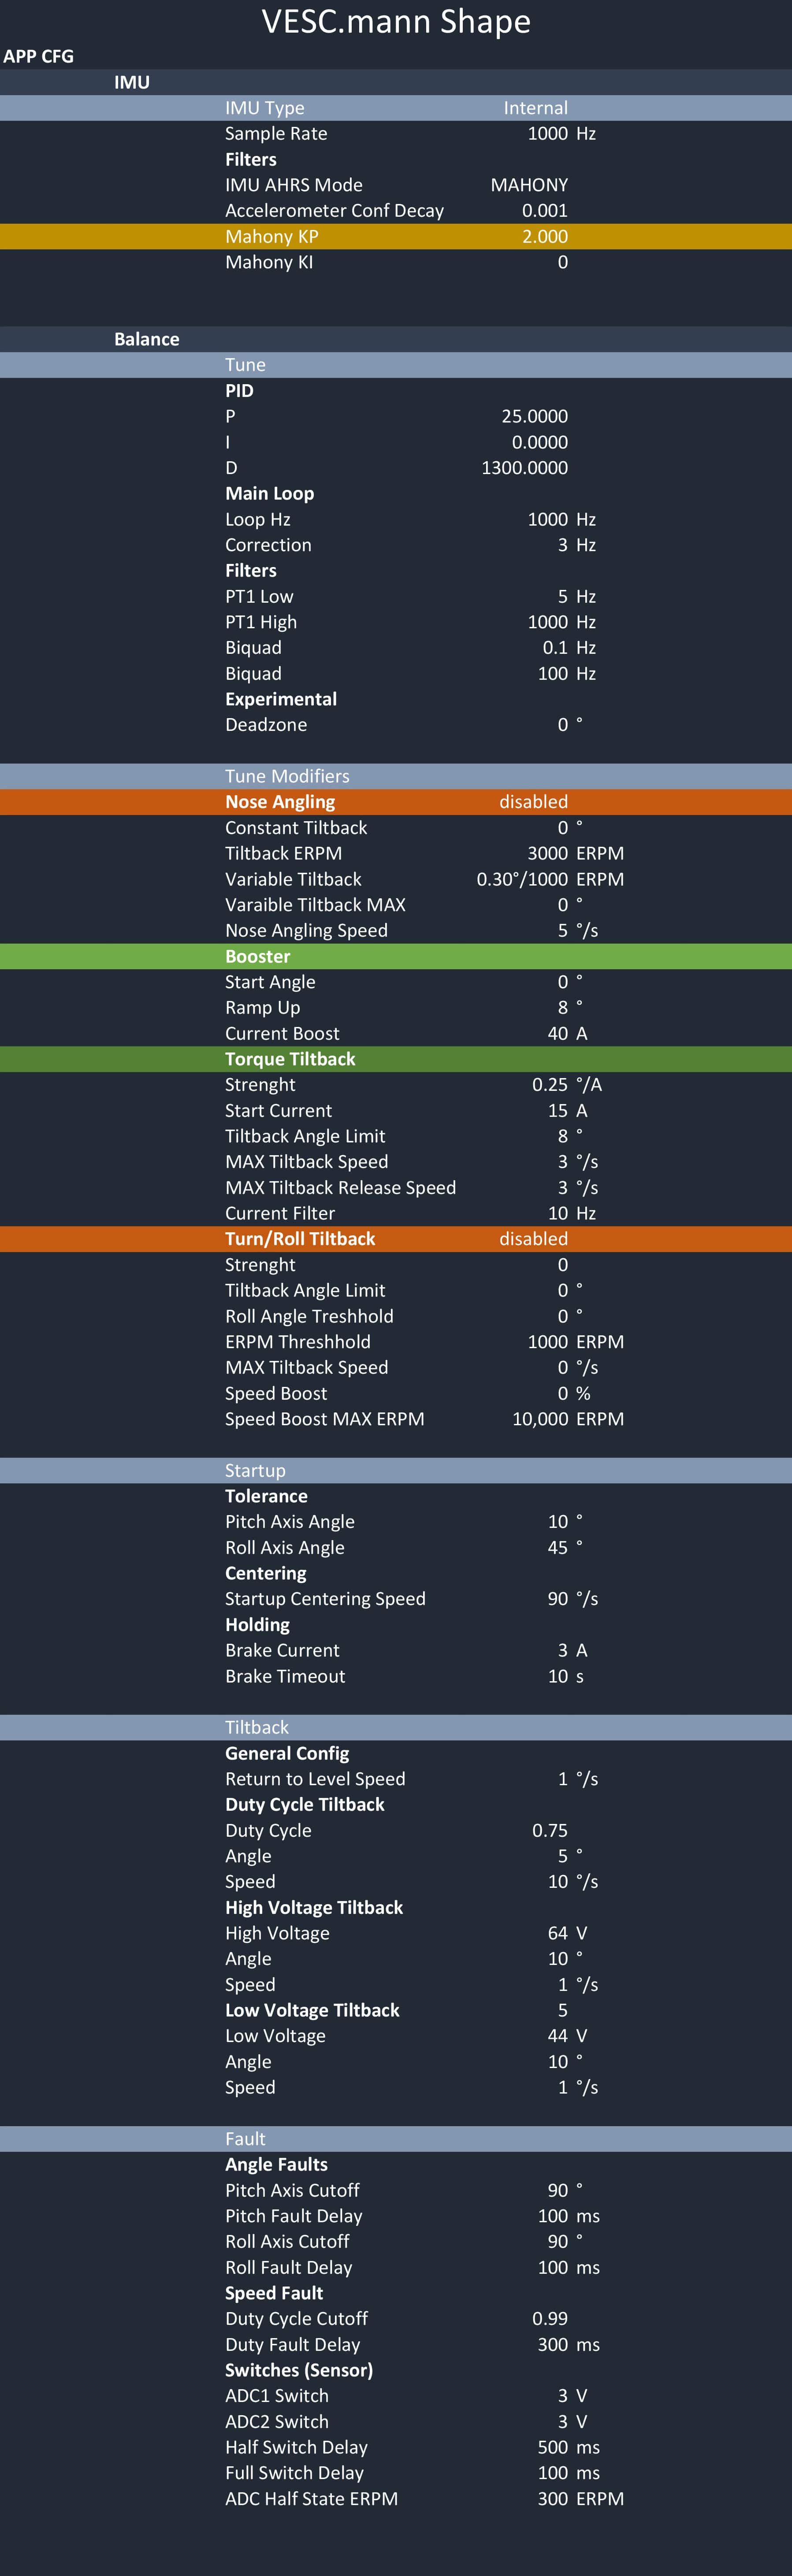
how to install the settings of a pro-rider?
You want to take your board to the next level and feel what it is to ride the board of a pro? Here’s your guide to a smoother ride. We present you with the VESC settings of our awesome team rider Hannes. He’s riding, ripping and representing our little Focer
CHECK HANNES' SMOOTH RIDES ON INSTAGRAM!
What do you need? A Windows computer and an Android phone/iPhone both connected to the same wifi network and the XML file with the settings of our team rider Hannes.
Steps to load XML file.
Step 1.
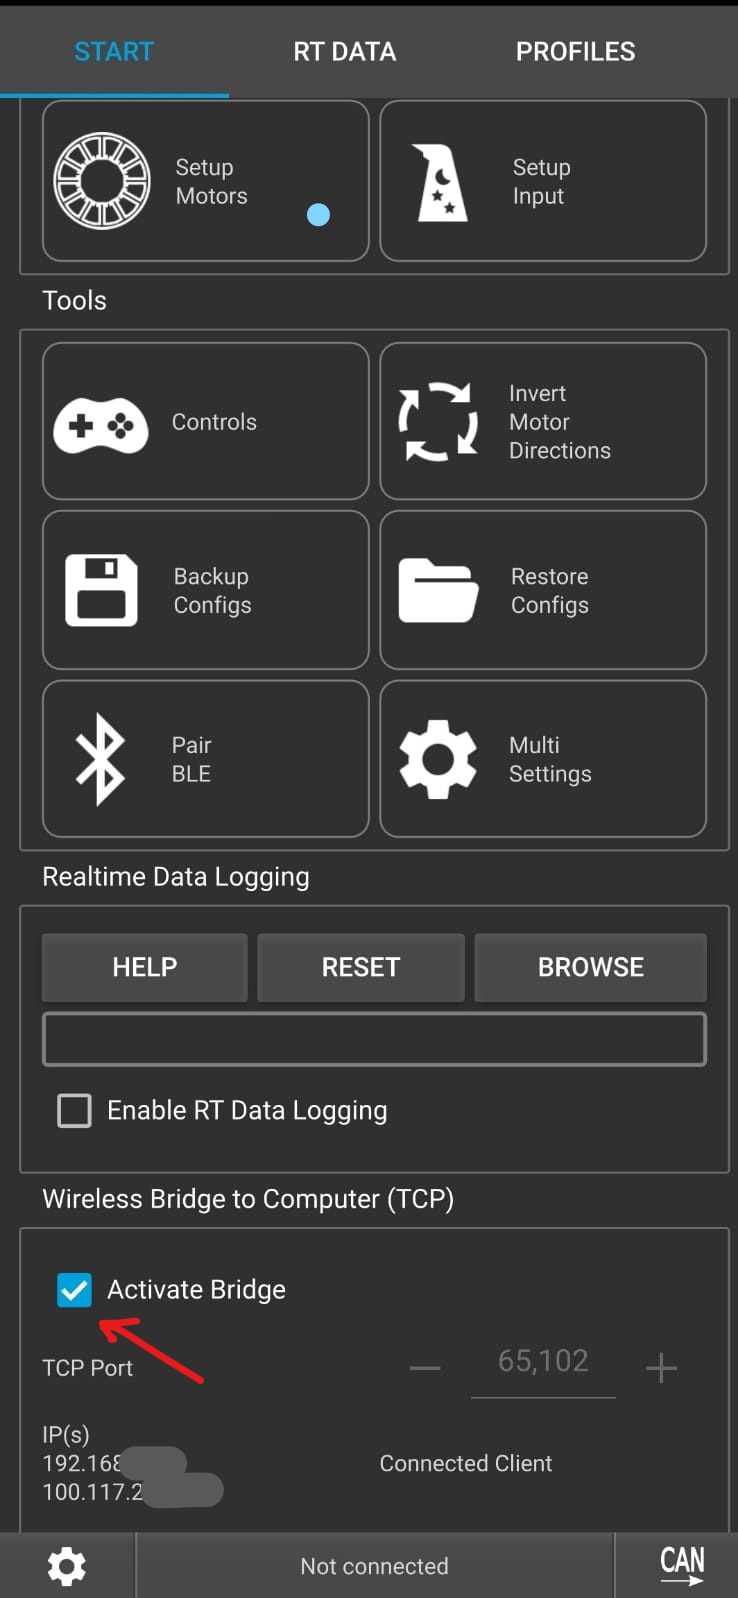
Connect your VESC to your computer with a bluetooth connection. Open the VESC-tool mobile/desktop app. You scroll downwards until you find the checkbox to activate the bridge. Check the box!
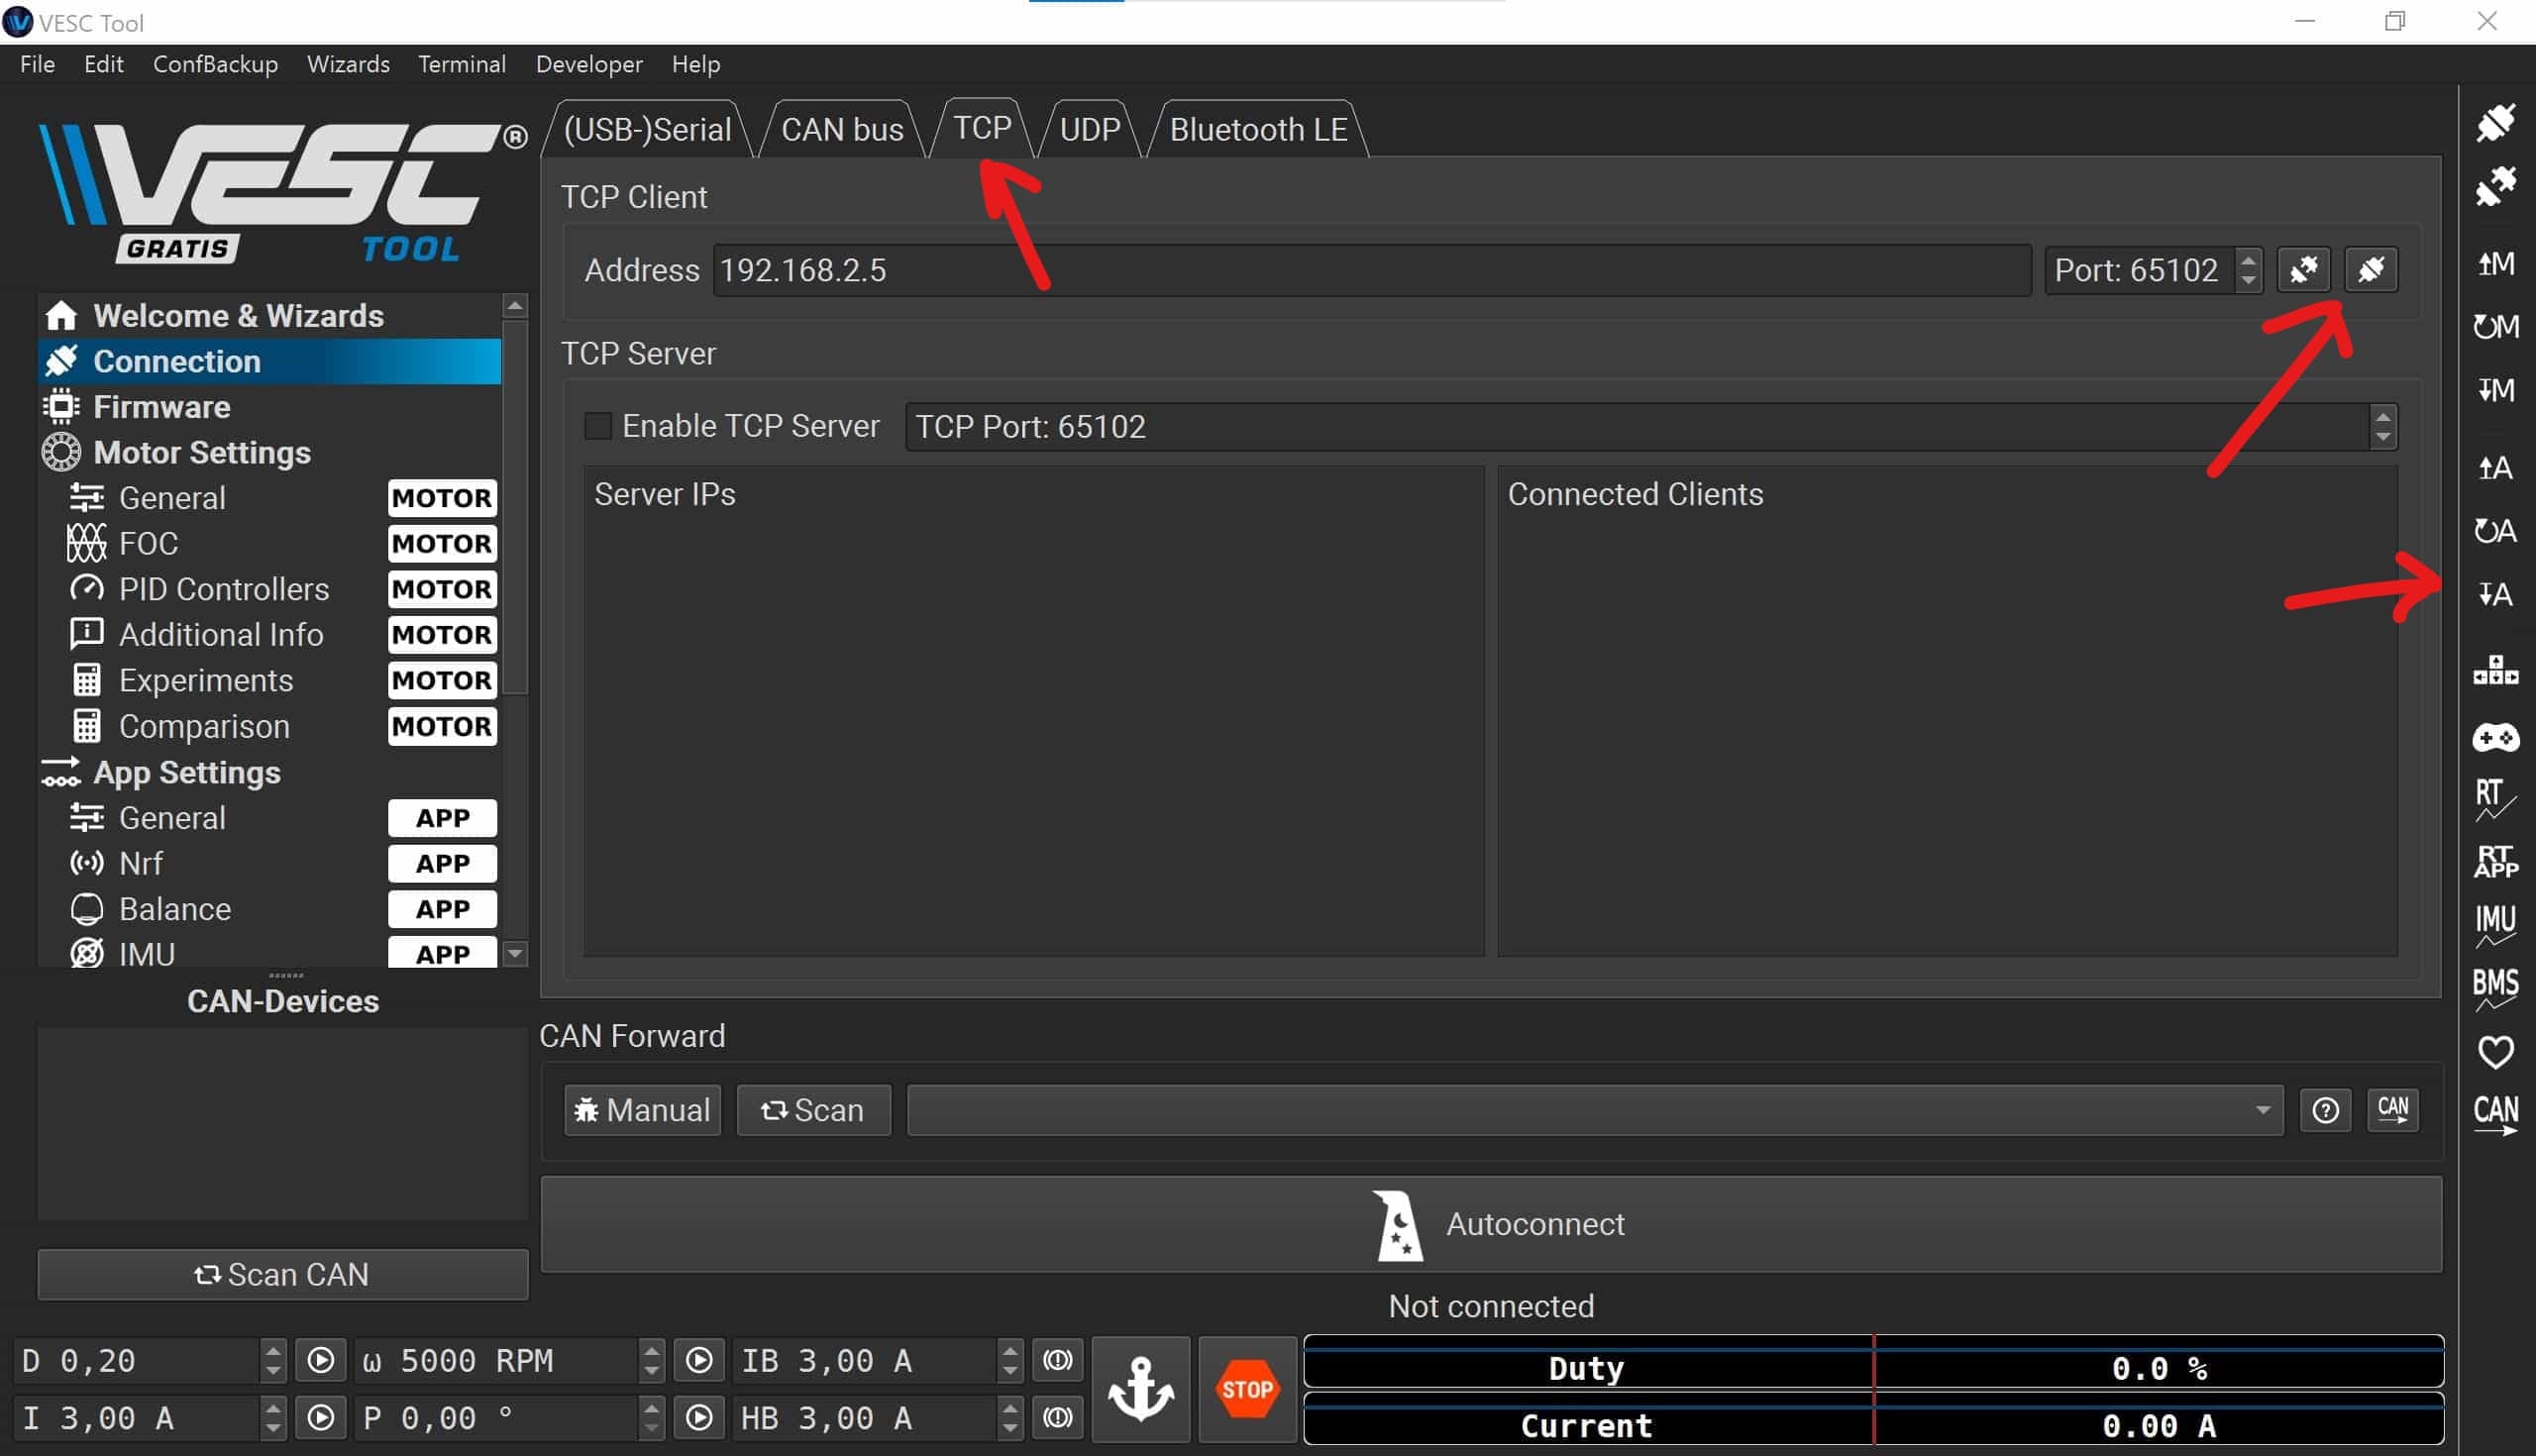
Step 2.
Once the TCP bridge is activated an IP-numbers appears in the mobile app. Now you can go to the VESC-tool desktop version. You click on the option “CONNECTION” in the menu on the left side of the screen. Five tabs appear, you on click the “TCP” tab. The IP- and port-number that appear in your screen, should be the same as the number in the mobile app. Now you can click on the “connect-icon” next to the Port-number to connect your VESC to the computer.
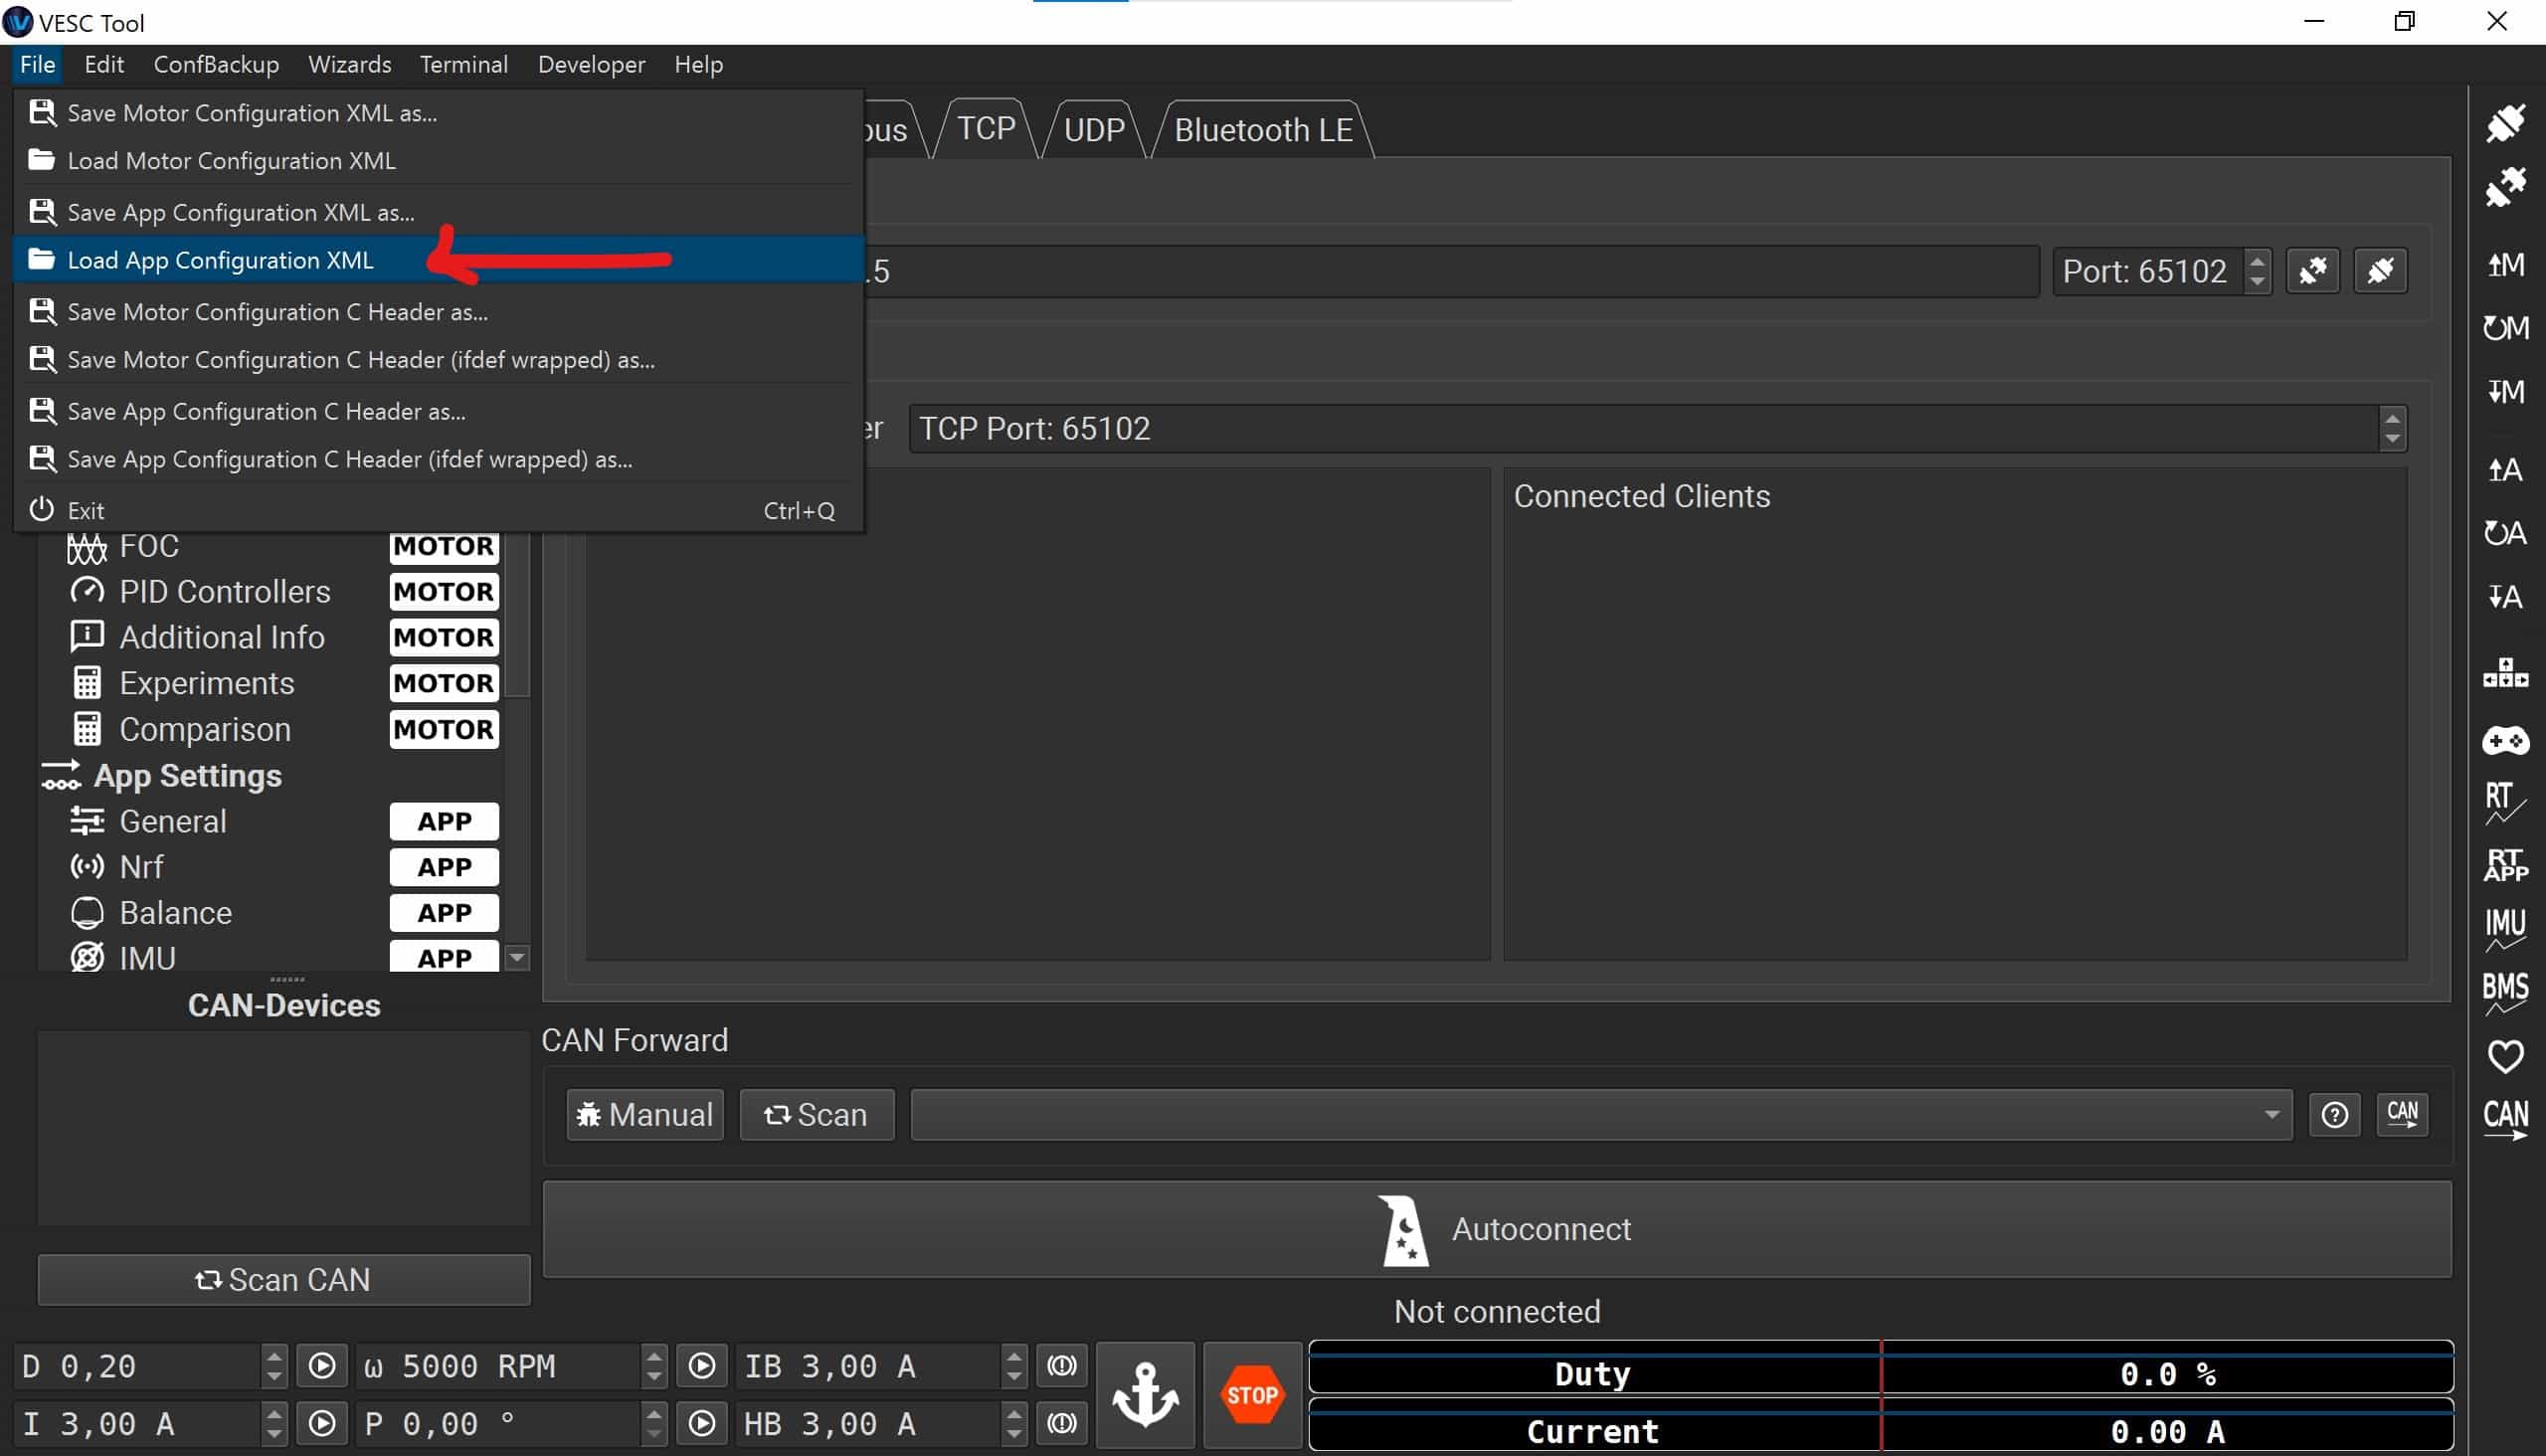
Step 3.
In the left top of your computerscreen you click “file” and choose “Load App Configuration XML” in the drop down menu. Choose the file of your favourite rider and click in the menu on the righthand side of your screen the A-icon with the arrow facing downward to save the settings to your VESC.